Export & Import
Move data in and out of any database Next DB can reach — download SQL dumps or CSV files, and load them back in via SQL scripts or CSV uploads, all within Joomla's access-control boundary.
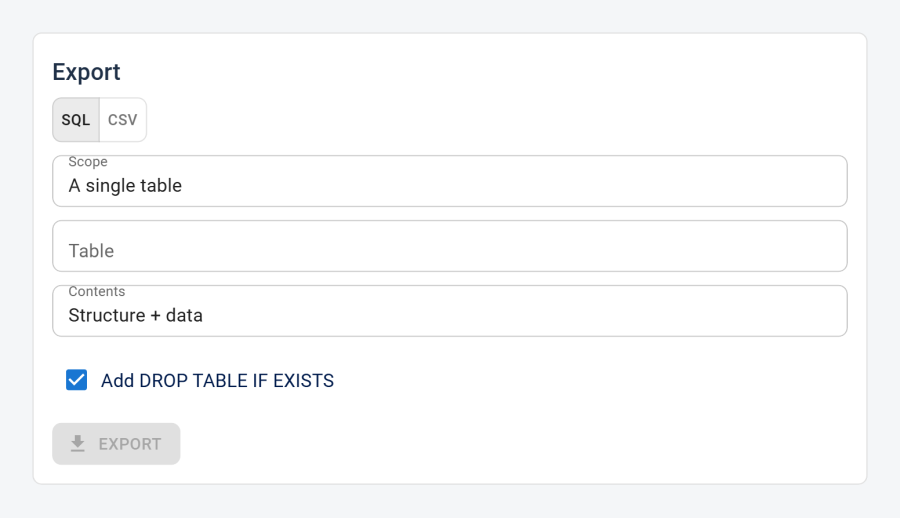
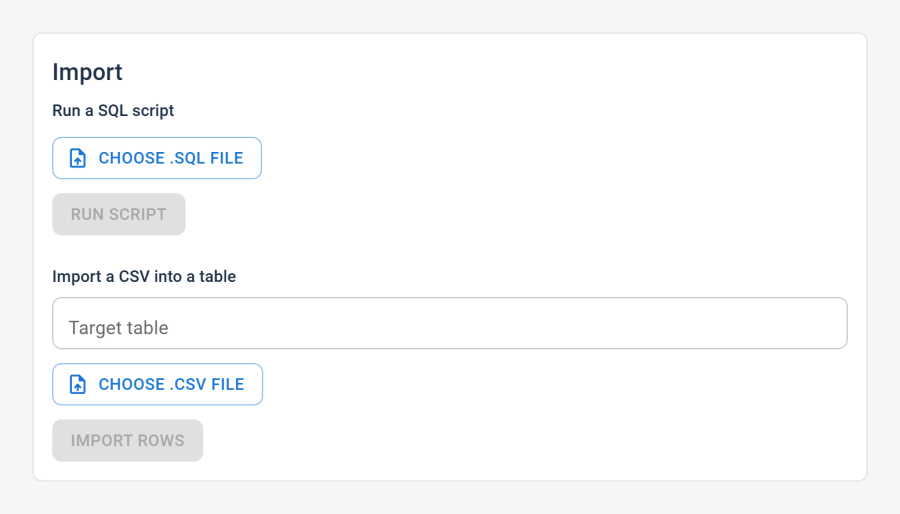
Export
SQL dump
A SQL export produces a plain-text .sql file that downloads straight to your browser. The filename is
<table>_<timestamp>.sql for a single table, or <database>_<timestamp>.sql for a whole-database dump.
Scope options
| Scope | What is exported |
|---|---|
| Single table | One named table only. |
| Whole database | Every table you are allowed to see (tables outside your access are silently excluded). |
Contents options
| Option | What is included |
|---|---|
| Structure + data (default) | The CREATE TABLE statements followed by INSERT statements for every row. |
| Structure only | The CREATE TABLE statements — no row data. |
| Data only | INSERT statements only — no CREATE TABLE. Use this when loading into a table that already exists. |
DROP TABLE IF EXISTS — when ticked (default), a drop statement is added before each table so a restore replaces the existing table. Untick this when you want to merge data into an existing table without wiping it first.
Next DB automatically uses the correct SQL formatting for each engine (identifier quoting, character-set headers, foreign-key handling), so a dump restores cleanly on the same engine.
Note: Very large whole-database exports are limited by your server's PHP memory setting; if a big export fails, export table-by-table instead.
CSV export
CSV export is available for a single table only (not whole-database). The file is named
<table>_<timestamp>.csv.
- A header row of column names is always included, even if the table is empty.
NULLvalues are written as an empty field (you cannot tell them apart from an empty string on import — preserve the distinction via SQL if it matters).- No filter: the CSV always contains every row from the table. To export a filtered subset, run a
SELECTin the SQL Console and copy the result, or export the full table and filter locally.
Import
SQL script
This is the right path for multi-statement scripts. The SQL Console runs exactly one statement at a time. If you need to restore a dump, run a migration, or replay any file with multiple statements, use Import — not the console.
Upload a .sql file. Its text is read in your browser, sent to the server, and run statement by statement.
How statements are split: Next DB splits the script into individual statements intelligently — semicolons inside quotes or comments are ignored, and empty or comment-only segments are skipped.
Note: Scripts that define triggers or stored procedures may not import correctly. Ordinary table dumps — the common case — import fine.
Running as a batch: all statements run together as one batch — if any fails, the whole import is rolled back.
Exception (MySQL / MariaDB): structure statements (create / alter / drop / etc.) can't be rolled back; if a script mixes structure and data changes and fails partway, some changes may remain. Next DB warns you before running a script that contains structure statements.
If a statement fails: the error names the statement by its position and shows a short excerpt of the offending SQL:
Statement #N failed:
Statement:<a short excerpt of the statement…>
The error is also recorded in the audit trail when audit recording covers imports.
When it succeeds: Next DB reports how many statements ran and the total affected rows:
Ran N statement(s); M row(s) affected.
If you are restoring a Next DB-generated whole-database dump, it already contains the correct foreign-key handling for the target engine. A third-party or hand-written script may need that handling added yourself.
CSV import
CSV import loads rows into a single target table.
Steps:
- Select a target table from the drop-down.
- Click Choose .csv file and pick the file. After it is read, the file name and row count are shown
(for example,
users_20260601.csv — 1 234 row(s)). - Click Import rows.
Your CSV is read in your browser and only the parsed rows are sent to the server. The first row is treated as a header of column names; Next DB matches those to the table's real columns — unrecognised columns are ignored, and columns missing from the CSV use the database's default value.
Running as a batch: all rows import together — if any row fails, none are imported, and the error tells you which row:
Row #N failed:
Null handling: an empty CSV field is sent as an empty string, not as NULL. If a column needs NULL
for missing values, adjust the CSV before importing.
When it succeeds:
Imported N row(s).
Access control
Both export and import are controlled by your profile:
| Permission | Controls |
|---|---|
| Export | SQL dump (table or whole-database) and CSV export. Required for the Export panel to appear. |
| Import | SQL script and CSV import. Required for the Import panel to appear. |
These permissions are set per connection in your profile. SQL import runs arbitrary SQL, so it is controlled by the Import permission rather than per-table access. CSV import targets a named table and is also subject to the table-scope check for that table.
Super Users bypass all of these. For everyone else, Export and Import must be explicitly granted in the profile.
See Profiles and Access Control for how these permissions are configured.