Quick Start
Get Next DB running, browse the Joomla database, attach an external database, and lock down access — from install to first audit entry in under ten minutes.
Step 1: Open Next DB
Go to Components → Next DB → Dashboard. The Dashboard shows connection health, recent audit events and quick navigation links.
To open the editor, click Editor in the sidebar (under Manage). The Joomla database is attached automatically and appears in the connection switcher at the top of the page as Joomla site database. No extra configuration is required for the host database.
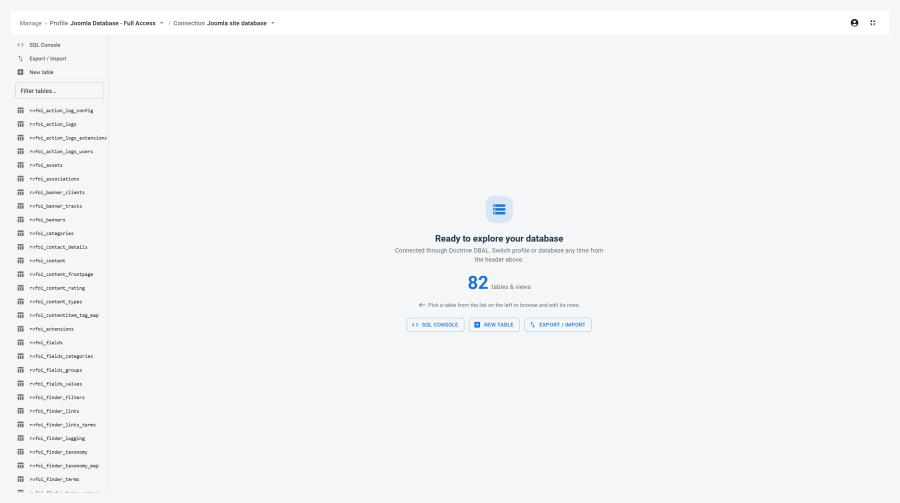
Use the object tree on the left to expand databases and tables. Click any table name to open the browse view — paginated rows with per-column sorting and inline filters.
See Editor for the full object-tree and browse-view reference.
Step 2: Browse and Run SQL
Browse a table — click any table in the object tree. The browse view loads the first page of rows. Use the column headers to sort and the filter row to narrow results. Click a row to open the row edit drawer (insert, update and delete are all here).
Open the SQL Console — click SQL in the editor toolbar (or the SQL Console entry in the sidebar). Type or paste one statement at a time; the console executes a single statement per run. Results display in a data grid below the editor.
Note: The SQL Console enforces Next DB's access control: the active profile must have SQL Console access granted for the selected connection. Super Users always have access.
See Editor and SQL Console for details.
Step 3: Attach an External Database
- In the sidebar click Connections, then New Connection.
- Select a driver — MySQL / MariaDB, PostgreSQL or SQLite.
- Fill in host, port, user, password and the target database name.
- Click Test to verify connectivity before saving.
- Click Save. The connection is stored; the password is stored encrypted, using a key derived from your Joomla site secret.
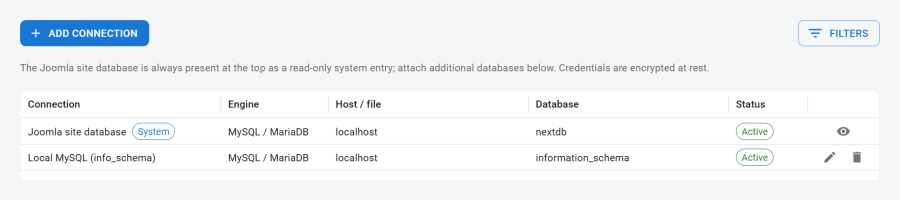
The new connection immediately appears in the editor's connection switcher. Switch to it to browse its object tree in the same editor surface.
See Connections for driver-specific options, SQLite path restrictions and the core-table protection setting.
Step 4: Delegate Access
By default only Super Users can access Next DB. To give other Joomla users or groups controlled access, create a profile.
- In the sidebar click Profiles, then New Profile.
- In the Permissions section, select which connections the profile may use and, per connection, which operations are allowed (browse, insert, update, delete, truncate, structure edits, export/import, SQL console).
- Optionally expand the Management section (Super Users only) to grant management-area access — for example, allow a DBA to manage connections without access to profiles or audit policy.
- Open the Assignments tab and add one or more Joomla users or user-groups.
- Save the profile. Assigned users see only the connections and operations the profile allows; everything else returns a clear permission error.
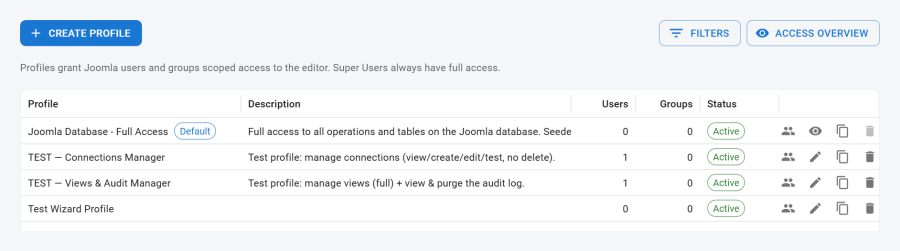
Access control is always enforced on the server and cannot be bypassed from the browser. Core Joomla tables are additionally protected on the Joomla site database regardless of profile settings.
See Profiles and ACL for the full permission options and how overlapping rules are resolved, and Delegated Management for granting non-super users administrative rights within Next DB.
Step 5: Set Policy
Two settings areas affect security and compliance across all users.
Audit policy (Settings → Audit) — controls what operations are recorded globally. The global policy applies to Super Users and to any profile that does not override it. You can configure which operation types are logged, whether failures are recorded, and the default retention period (rows older than the retention window are eligible for pruning by the scheduled task or manual purge).
Security (Settings → Security) — sets the SQLite base directory: the filesystem path under which all SQLite database files must reside. Next DB rejects any SQLite connection path that escapes this directory. Non-super users cannot create SQLite connections until a base directory is configured by a Super User.
See Audit Policy and Security.
What Happens Next
A Super User opens the editor. Every connection appears in the connection switcher. Every operation is available. All activity is recorded according to the global audit policy. Core Joomla tables on the site database are protected against mutations regardless of what SQL or operations are attempted.
An assigned non-super user opens the editor. Only the connections the profile permits appear in the connection switcher. Attempting a disallowed operation — or trying to mutate a protected table — returns a clear permission error; no data is changed and the attempt is logged. The SQL Console is available only if SQL Console access is enabled for that connection.
The audit log fills up. Open the Audit page to filter by user, connection, operation or date range; click any entry to inspect the before/after row snapshot. Use Purge to remove entries beyond the retention window on demand, or let Next DB's scheduled audit-cleanup task prune them automatically on your schedule.
Further reading:
- Editor — object tree, browse, row edit, structure, export/import
- SQL Console — statement execution, history, result export
- Structure Editor — columns, indexes, foreign keys, structure preview
- Export / Import — SQL dump and CSV transfer
- Audit Trail — log viewer, before/after snapshots, retention
- Data Views — read-only frontend views for site users
- Connections — driver options, encryption, core-table protection
- Profiles and ACL — permission model, resolution order
- Delegated Management — non-super management rights
- Audit Policy — global defaults, per-profile overrides, retention
- Security — SQLite paths, hardening options
- Settings — all global configuration keys