Items
The Items screen is the heart of Next Inventory. Every physical thing you track — laptops on loan, stationery in the supply cupboard, products on sale — exists here as a single record with a stock quantity, identifiers (SKU, barcode, serial), a category, a warehouse, and an audit trail attached to it. Open it from Components > Next Inventory > Items.
For Users
Finding an Item
Three routes to any item, in order of speed:
- Quick lookup bar at the top of every Next Inventory page — type or scan a SKU, barcode, or serial number and press Enter to jump straight to the item.
- Items list — use the search box (title / SKU / barcode / description), the Item Type filter (Asset / Sellable / Consumable), the Category filter, the Warehouse filter, or the Status filter.
- Scanner page — optimised for warehouse-floor lookups with large fonts and big tap targets.
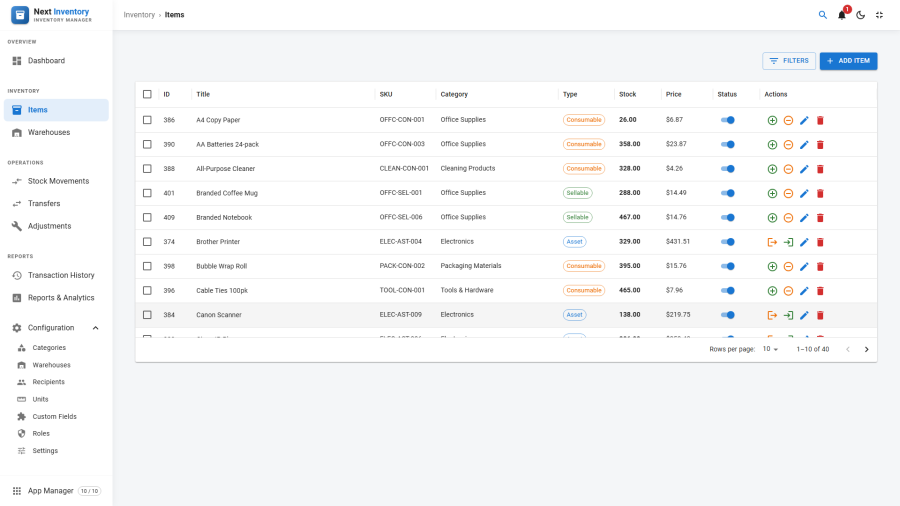
The list shows Title, SKU, Item Type chip, Stock Quantity, Unit Price, and Status. Rows turn red when the live stock drops at or below the item's low-stock threshold — that's your visual cue to reorder.
Day-to-Day Workflows
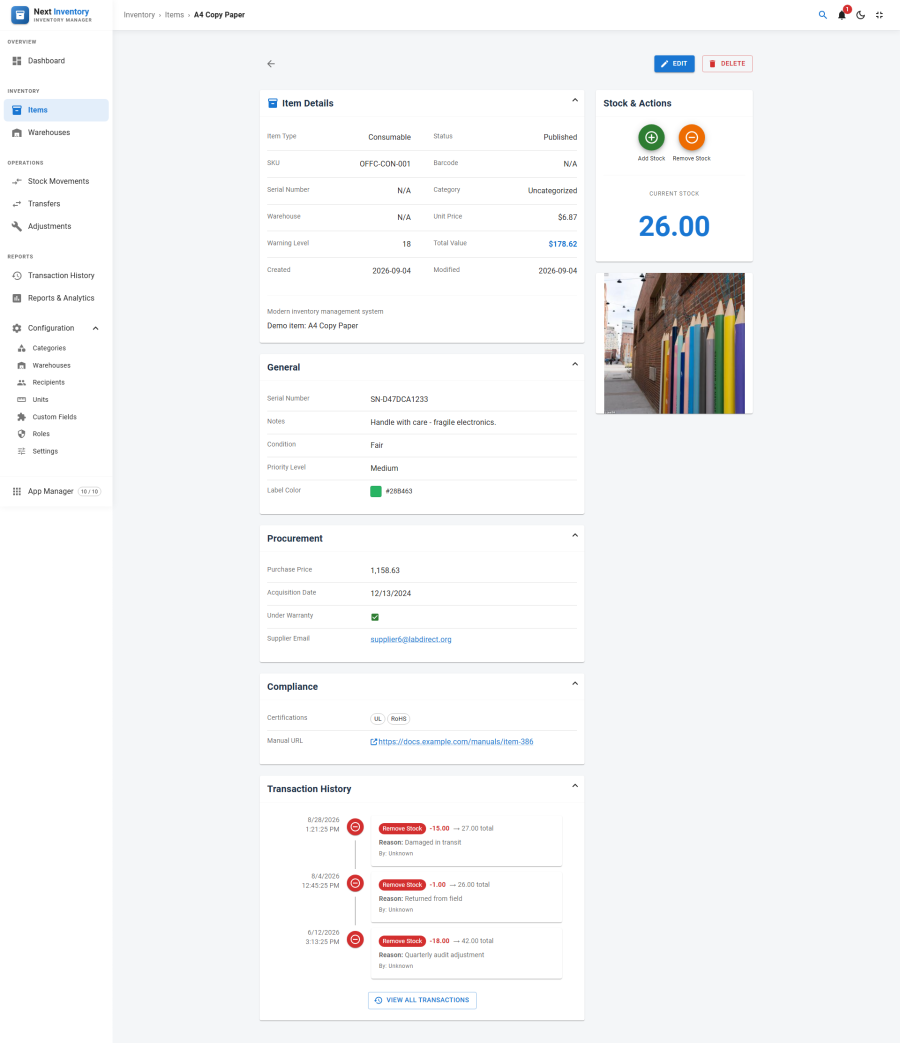
- Check if we have it in stock — scan or type the barcode in the quick-lookup bar. You'll land on the item details with live quantity.
- Check stock out to someone — on an Asset item, open the actions menu and choose Check Out. Pick a recipient, set the quantity, optionally add a reason, save. The item's stock goes down; the transaction appears in Transactions.
- Return stock — on an Asset item that's out, choose Check In, confirm the recipient and quantity, save.
- Add or remove consumable stock — on a Consumable or Sellable, use Add Stock or Remove Stock. A reason field is mandatory when removing so the audit trail always explains why.
- Record damage or loss — use Adjustments (from the action menu or the Adjustments tab) rather than editing the stock quantity field directly — it keeps the audit trail honest.
Important: never edit the Stock Quantity field on an item record to correct a number. Direct edits do not create a transaction, which means the audit log stops matching reality. Always use a transaction (Add Stock / Remove Stock / Adjustment) instead.
Acting on Several Items at Once
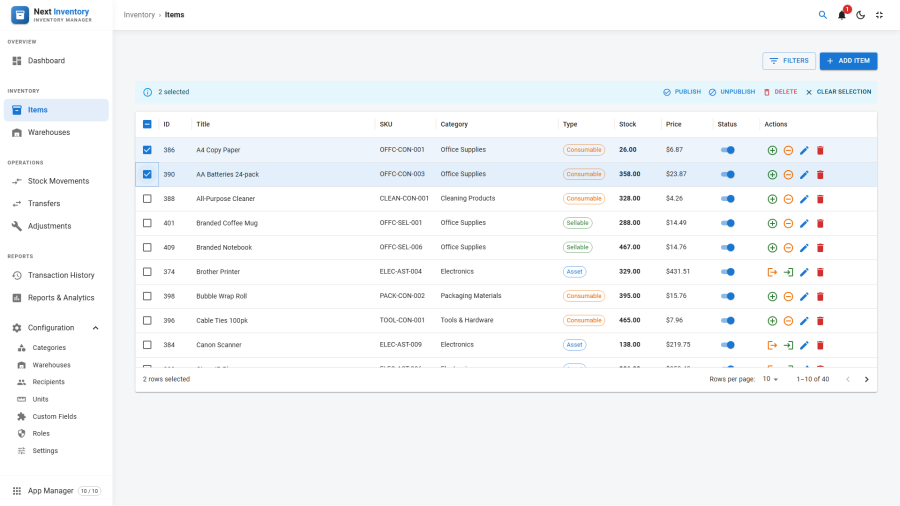
Tick the checkbox at the left of any row. Ticking it selects the row — it does not open the item. A toolbar appears above the list showing how many rows you have picked, with:
- Publish / Unpublish — change the status of everything selected in one go.
- Delete — remove them. You are asked to confirm, and it cannot be undone. Deleting items leaves their transaction history in place.
- Clear selection — untick everything.
You only see the buttons your role allows.
For Admins
Creating an Item
Open Items > New and fill in the form. The minimum required fields are Title, Item Type, Category, Stock Quantity, and Low Stock Threshold — everything else is optional. Only published categories and warehouses appear in the dropdowns, so create those first if they're missing (see Categories and Warehouses).
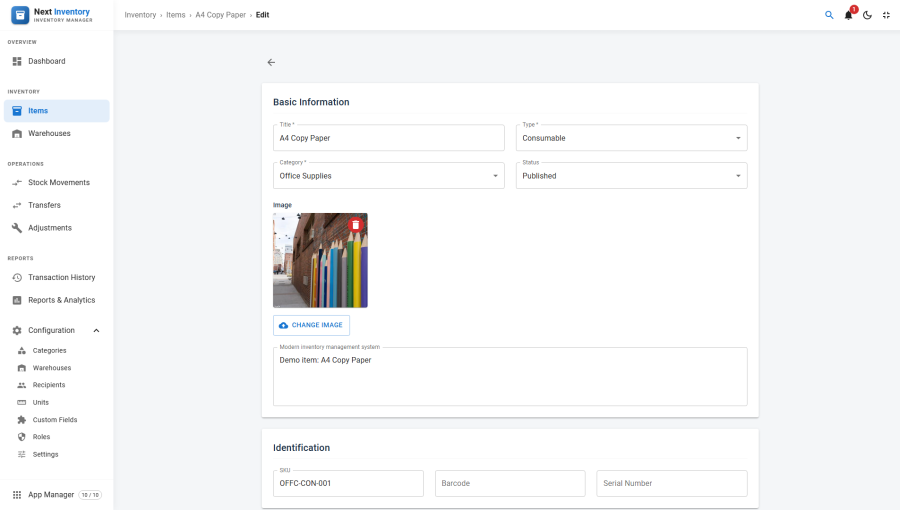
Item Type is a hard choice — it controls which transactions appear in the UI and can't be changed cleanly once the item has history:
- Asset — check-out and check-in transactions; typical for equipment loaned to staff.
- Consumable — add-stock and remove-stock; typical for supplies used up over time.
- Sellable — add-stock and remove-stock; typical for products you sell with stock-level tracking.
Three optional identifier fields make items scannable and searchable — they look similar but serve different jobs:
- SKU — your internal stock-keeping code, shared by every unit of the same product.
- Barcode — the scannable code on the packaging (EAN, UPC, Code 128); this is what the Quick Search matches first.
- Serial Number — unique to one physical unit; use it for assets you track individually.
Set a Unit Price if you want the item to count towards stock valuation on the Dashboard and in Reports — items without a price contribute zero to those figures. Enable Weight Tracking if you also need transactions on this item to record weights.
Images and Thumbnails
The Image field accepts one image per item. On save, Next Inventory automatically generates a small and a medium thumbnail alongside the original, so lists and detail pages always load a size-appropriate copy. Thumbnail dimensions, image quality, WebP support, and EXIF-stripping are controlled centrally from Settings. Review the Upload settings there before uploading production photos — changing thumbnail dimensions later applies only to new uploads; existing images keep the thumbnails they were saved with.
Custom Fields
Any fields you define in Configuration > Custom Fields with the item context appear automatically at the bottom of the edit form. Flag a field as searchable and it also becomes available as a filter on the Items list. See Custom Fields for the full guide.
Inventory Layers
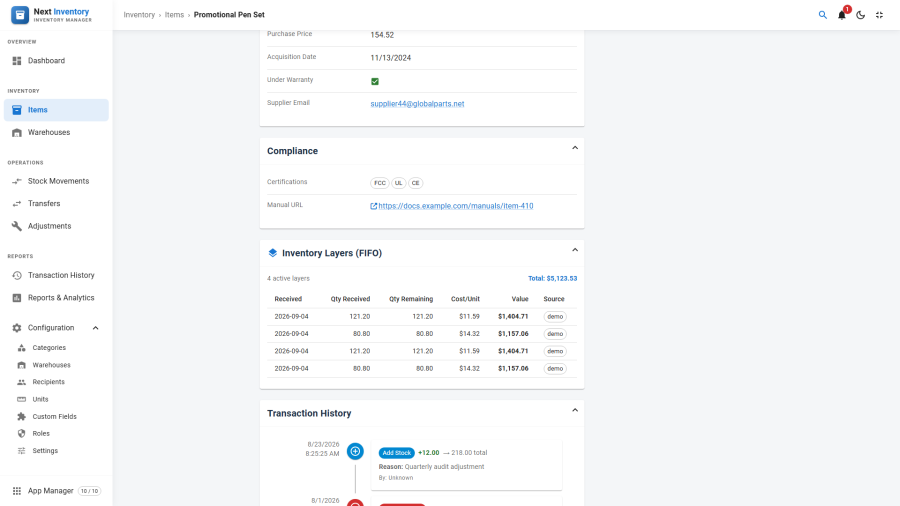
When Inventory Costing is set to FIFO or LIFO, consumable and sellable items gain an Inventory Layers card on their detail page, headed with the method in force. Each receipt of stock is one layer, and the card lists the open ones with the date received, quantity received, quantity remaining, cost per unit, current value, and the source that created it — with the item's total layer value in the corner.
This is the per-item view of the same data the Inventory Aging report summarises across the whole catalogue, and it is where you check what a single item's stock actually cost you rather than what it currently lists for.
Assets never get the card — layer costing applies to consumables and sellables only. On Standard costing the card is absent entirely, and an item whose layers have all been consumed shows "No active inventory layers for this item".
To capture real purchase costs rather than falling back to the item's unit price, fill in the Cost/Unit field when you add stock — see Stock Movements.
Permissions
Actions on this screen are gated by the inventory and transactions
permission groups (see Roles & Permissions):
| Action | Feature | Permission |
|---|---|---|
| See the Items list | inventory |
view |
| Create an item | inventory |
create |
| Edit any item | inventory |
edit |
| Edit only items you created | inventory |
edit.own |
| Delete an item | inventory |
delete |
| Check out / check in | transactions |
checkout / checkin |
| Add / remove stock | transactions |
add_stock / remove_stock |
| Publish / unpublish selected items | inventory |
edit |
| Delete selected items | inventory |
delete |
Super administrators bypass all checks. Users without a matching permission simply don't see the button — there are no forbidden-error pages, the UI hides what you can't do.
Edge Cases
- Deleting an item does not delete its transactions. The item's history stays in the transaction log so your audit trail remains complete. There's no built-in "wipe item history" button on purpose — if you genuinely need an item's history removed, contact [email protected].
- Changing the unit on an item with history doesn't retroactively convert past transactions. New transactions use the new unit; old ones stay in the unit they were recorded in. Unit conversion only applies at transaction save, not at report time.
- Decimal stock quantities — the Stock Quantity field accepts decimals, so bulk materials and fluids work natively. If you only ever track whole units, simply enter whole numbers; nothing in the UI forces integer values.
- Serial-numbered assets — entering a serial tracks exactly which unit is with which recipient. If you have multiple physical units sharing a model, create one item per serial rather than one item with quantity 5 and a single serial field.