Quick Start
From a fresh install to a published exam that someone can actually sit, in five steps.
Step 1: Open Next Exams
Go to Components → Next Exams. The application opens on the Dashboard.
There is nothing to configure first. Every setting ships with a working default, all fifteen plugins were enabled during installation, and all twenty-six apps are switched on. You can go straight to authoring.
Tip: if you would rather explore a populated system before building your own, install the demo dataset from Configuration → Demo data. It seeds subjects, questions of every type, exams, attempts and certificates, and switches on a demo mode that blocks writes so you cannot break anything. Removing it restores the site cleanly.
Step 2: Create a Subject and Add Questions
Questions are filed against a subject, so create one first.
- Open Authoring → Subjects and click New.
- Give it a title and save. Nest further subjects under it by choosing a parent — the tree maintains its own paths, so you can reorganise later without breaking anything.
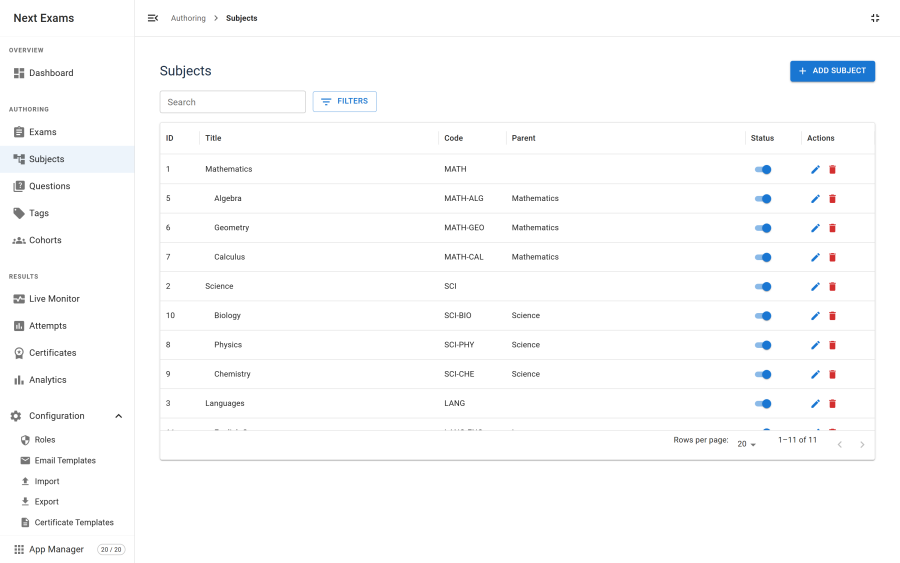
Now add questions.
- Open Authoring → Questions and click New.
- Pick a type — start with Multiple Choice (single answer) if you are unsure.
- Write the stem, add options, and mark the correct one.
- Choose the subject and set the points.
- Save and continue for the next one.
Note: the type picker offers nine types. Ordering, matching, extended matching and cloze are grouped as advanced types and can be switched off entirely in the App Manager if you never want authors reaching for them.
Step 3: Build an Exam
- Open Authoring → Exams and click New.
- Give the exam a title and pick its subject.
- On the Structure tab, add questions one of two ways — or both:
- Fixed questions are pinned. Every examinee gets exactly these.
- Pool rules draw a number of questions at random from a subject or tag. Each examinee gets a different draw.
- On the Access & Release tab, choose who may sit it and when results appear.
- Set a time limit and a pass mark, then save.
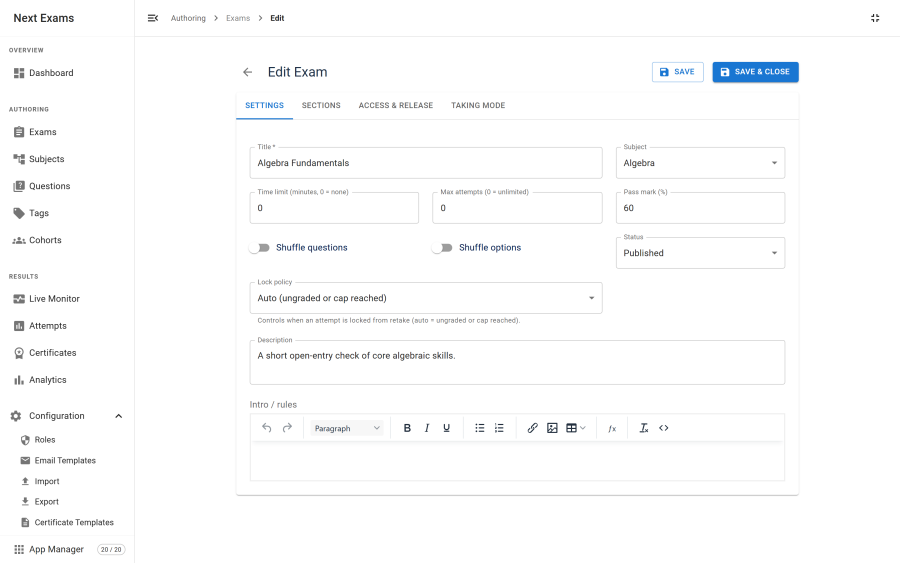
Note: the question total shown in the exam list counts fixed questions only. A pure-pool exam legitimately shows zero there — the exam detail view shows the real total, fixed questions plus each pool's draw count.
Publish the exam when you are happy with it.
Step 4: Publish It to the Site
Installing the package does not create any front-end pages, so an exam is not reachable until you add a menu item.
- Go to Menus → [your menu] → Add New Menu Item.
- Set Menu Item Type to NextExams - Exams for a listing of everything available, or NextExams - Single Exam to point directly at this one.
- Save, then visit the page as a visitor would.
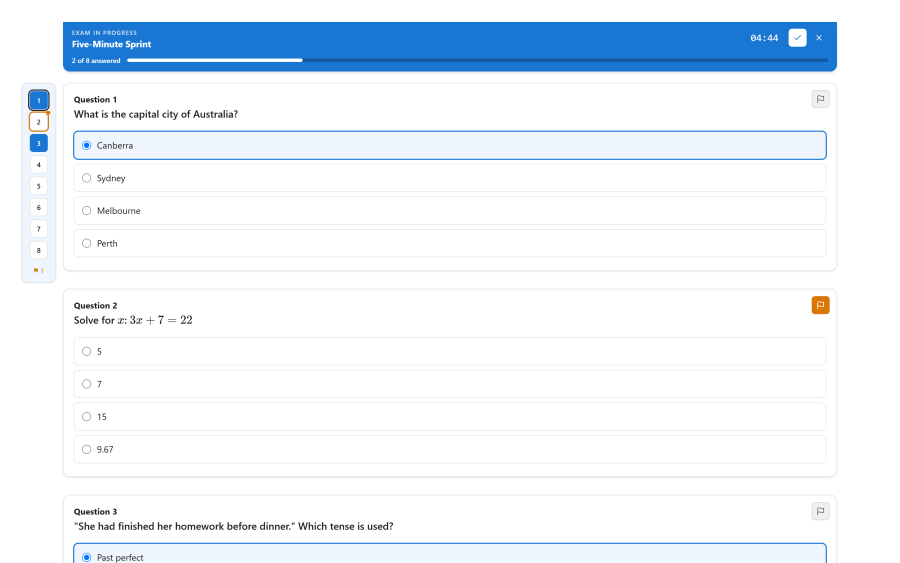
Take the exam yourself. Answers autosave as you work — only what changed is posted, and an unacknowledged save is re-sent on the next one.
Step 5: Watch and Grade
While the exam is running, open Results → Live Monitor to see who is in, how far along they are and how long they have left. You can extend someone's time, allow a resume, or force a submit from there.
After the submit:
- Everything except essays grades itself, with partial credit where the question allows it.
- Essays queue for you. Open Results → Attempts, pick the attempt and mark them. Until marking is finished, the examinee's review stays locked so they never see a half-marked paper.
- Results appear when you decided they should — immediately, after the exam closes, at a scheduled time, or only when you release them by hand.
What Happens Next
- The examinee passed and the exam has a certificate template: a PDF certificate is issued automatically, once, with a QR code linking to a public verification page.
- The attempt contains an essay: the attempt is marked as needing grading and, if you enabled the notification, an email tells you so. The examinee sees a pending notice rather than a score.
- The exam covers two or more subjects: the result page breaks the score down per subject, weakest first, and names the areas to revise.
- You have webhooks or LTI configured: the submission and the grade are pushed out — signed HTTP notifications to your endpoints, and a score back to the LMS gradebook.
- You want to know if the questions are any good: after a few dozen attempts, Results → Analytics reports each question's difficulty and how well it discriminates between strong and weak candidates.