Quick Start
Three steps take a fresh install to a restaurant that can take an order. Everything else — kitchen routing, reservations, terminals, delivery zones — builds on top of what you set up here.
Open Components → Next Restaurant to begin.
Step 1 — Create your location
Almost everything in Next Restaurant hangs off a location, so create one before anything else.
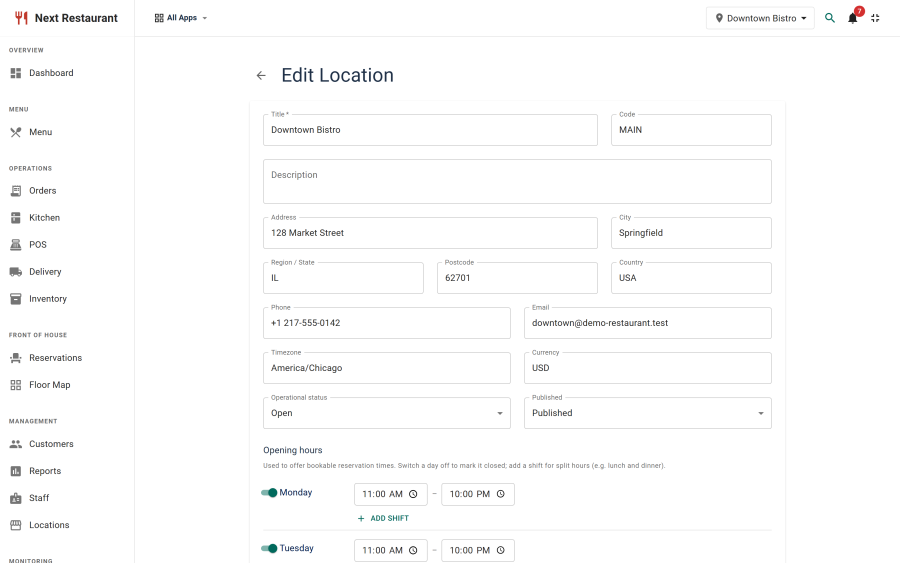
Go to Locations → New and fill in:
- Name and contact details — what guests see on the storefront and on receipts.
- Opening hours — per day, with the option of split shifts (lunch and dinner as separate windows). The reservation availability engine and the ordering pages both read these, so a mistake here shows up as missing booking slots later.
- Currency, tax rate and service charge — used for every price the system calculates. Currency formatting itself (symbol position, decimal places) is under Settings → Currency.
- Timezone — orders, bookings and shift times are all stamped against it.
Save. If you run more than one venue, add the rest now — menu pricing, stock, staff and terminals can all be scoped per location afterwards.
Step 2 — Build the menu
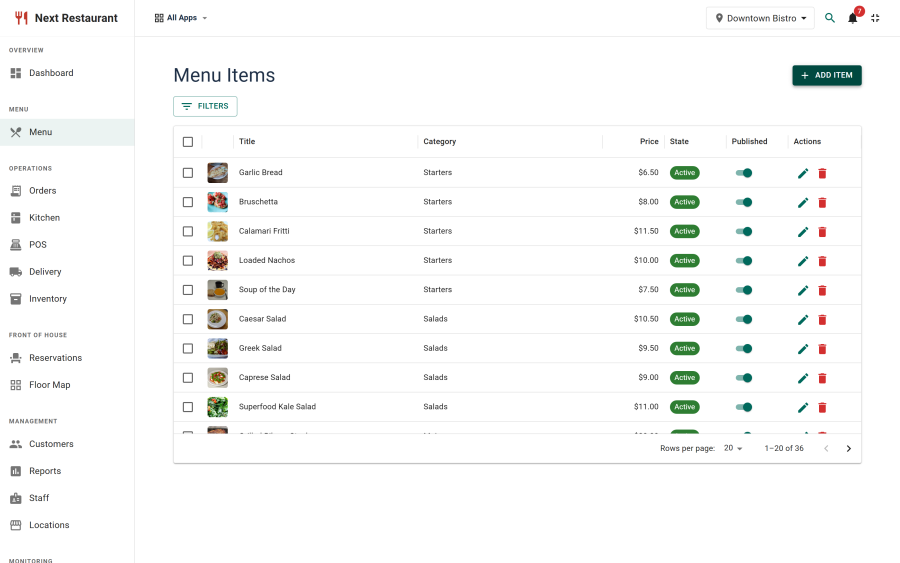
Go to Menu Categories first and create the sections your menu is organised into — Starters, Mains, Desserts, Drinks. Categories control the order things appear in on the public menu, so set their ordering while you're there.
Then go to Menu → New for each dish:
- Name, description, price and category — the minimum to make an item sellable.
- Image — upload and crop it in place. Menu photography is the single biggest lever on the storefront, so it's worth doing properly.
- Allergens and dietary tags — set up your allergen list under Menu → Allergens first if you haven't; tags surface on the public menu and on the kitchen ticket.
- Modifier groups — create reusable option sets under Menu → Modifier Groups (sizes, extras, cooking preferences, with min/max rules and price deltas) and attach them to the items that need them.
You do not need the whole menu to continue — three or four items are enough to test the flow end to end.
Step 3 — Publish the storefront and take a test order
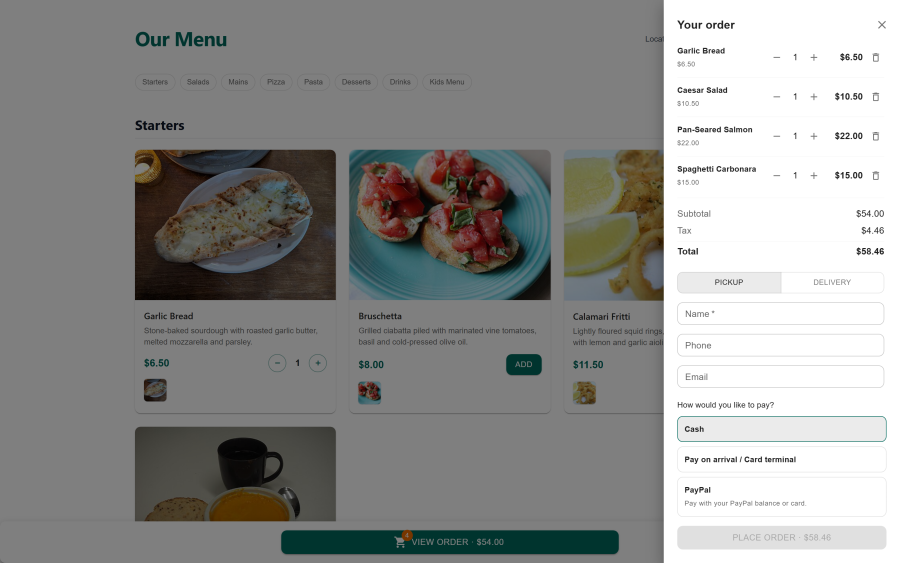
Create the public pages as Joomla menu items: Menus → (your menu) → Add New Menu Item, choose Next Restaurant → Menu for the menu showcase and Next Restaurant → Order for online ordering. Save both, then visit them on the site.
Now place a test order from the storefront and watch it move:
- Add an item to the cart on the Order page and check out. Set the order to pickup so no delivery zone is required.
- In the admin, open Orders — the order is there, with its channel marked as online.
- Open Kitchen — the ticket is on the board, routed to whichever station your rules send it to (everything goes to the default station until you configure routing).
- Open POS, find the check, and settle it with cash.
That round trip exercises the whole pipeline: storefront → order record → kitchen display → payment → ledger.
What Happens Next
You now have a working restaurant. What you configure next depends on how you actually operate:
- Taking card payments? Configure PayPal under Payment Gateways. Until you do, only manual settlement types (cash, card terminal, bank transfer, on-account) are available. Stripe, Adyen, Square and SumUp are listed as Coming soon and cannot be enabled in 6.0.0 — for cards in person, Card terminal works alongside a reader you already own.
- Running a kitchen with more than one section? Set up stations and routing rules so lines go to the grill, fry and pass separately. See Kitchen Display.
- Taking bookings? Add tables and areas, draw your floor plan, and publish the booking page. See Reservations and Floor Map.
- Serving guests at tables? Turn on QR ordering, print the per-table codes, and let guests order from their phones. See QR Ordering.
- Putting screens on the floor? Provision staff terminals for POS, kitchen, pickup, waiter, host and clock-in, so staff use them without a Joomla login. See Staff Terminals.
- More than one person using it? Create roles and assign them, so the kitchen sees the kitchen and the manager sees the reports. See Roles & Permissions.
- Not using part of it? Switch modules off under Apps — the nav item disappears and the endpoints refuse the request. See Apps & Modules.
And if you would rather explore with data already in place, turn on Demo Mode: it seeds a fully populated restaurant and puts the component into a read-only tour where nothing you click can change anything.